MxPluginContext in MxCAD Project
Preface
In the previous article, we have mentioned how to set the UI configuration in the MxCAD project of the Cloud Drawing SDK by manually modifying the configuration file. If you are unclear or do not understand something, you can review the document Method of Modifying UI Configuration for Web CAD Secondary Development. Since in the formal development process, we may set different UI interface displays according to different permissions, or add different buttons in MxCAD, we provide a context object MxPluginContext in the MxCAD project. Using the properties and methods exported inside this object, we can directly set the UI interface display of the project through code. Below we will detail how to use MxPluginContext to dynamically control the UI interface of MxCAD, and how to better adapt our project through this context object.
Dynamically Control the UI Interface
In the MxPluginContext object of the MxCAD project, we provide a getUiConfig() method. Calling this method allows us to obtain the JSON object in the mxUiConfig.json configuration file under the directory MxDrawCloudServer\SRC\sample\Edit\2d\dist. By modifying the property values in this object, we can achieve the purpose of modifying the interface UI.
Control the display/hide of the interface operation bar
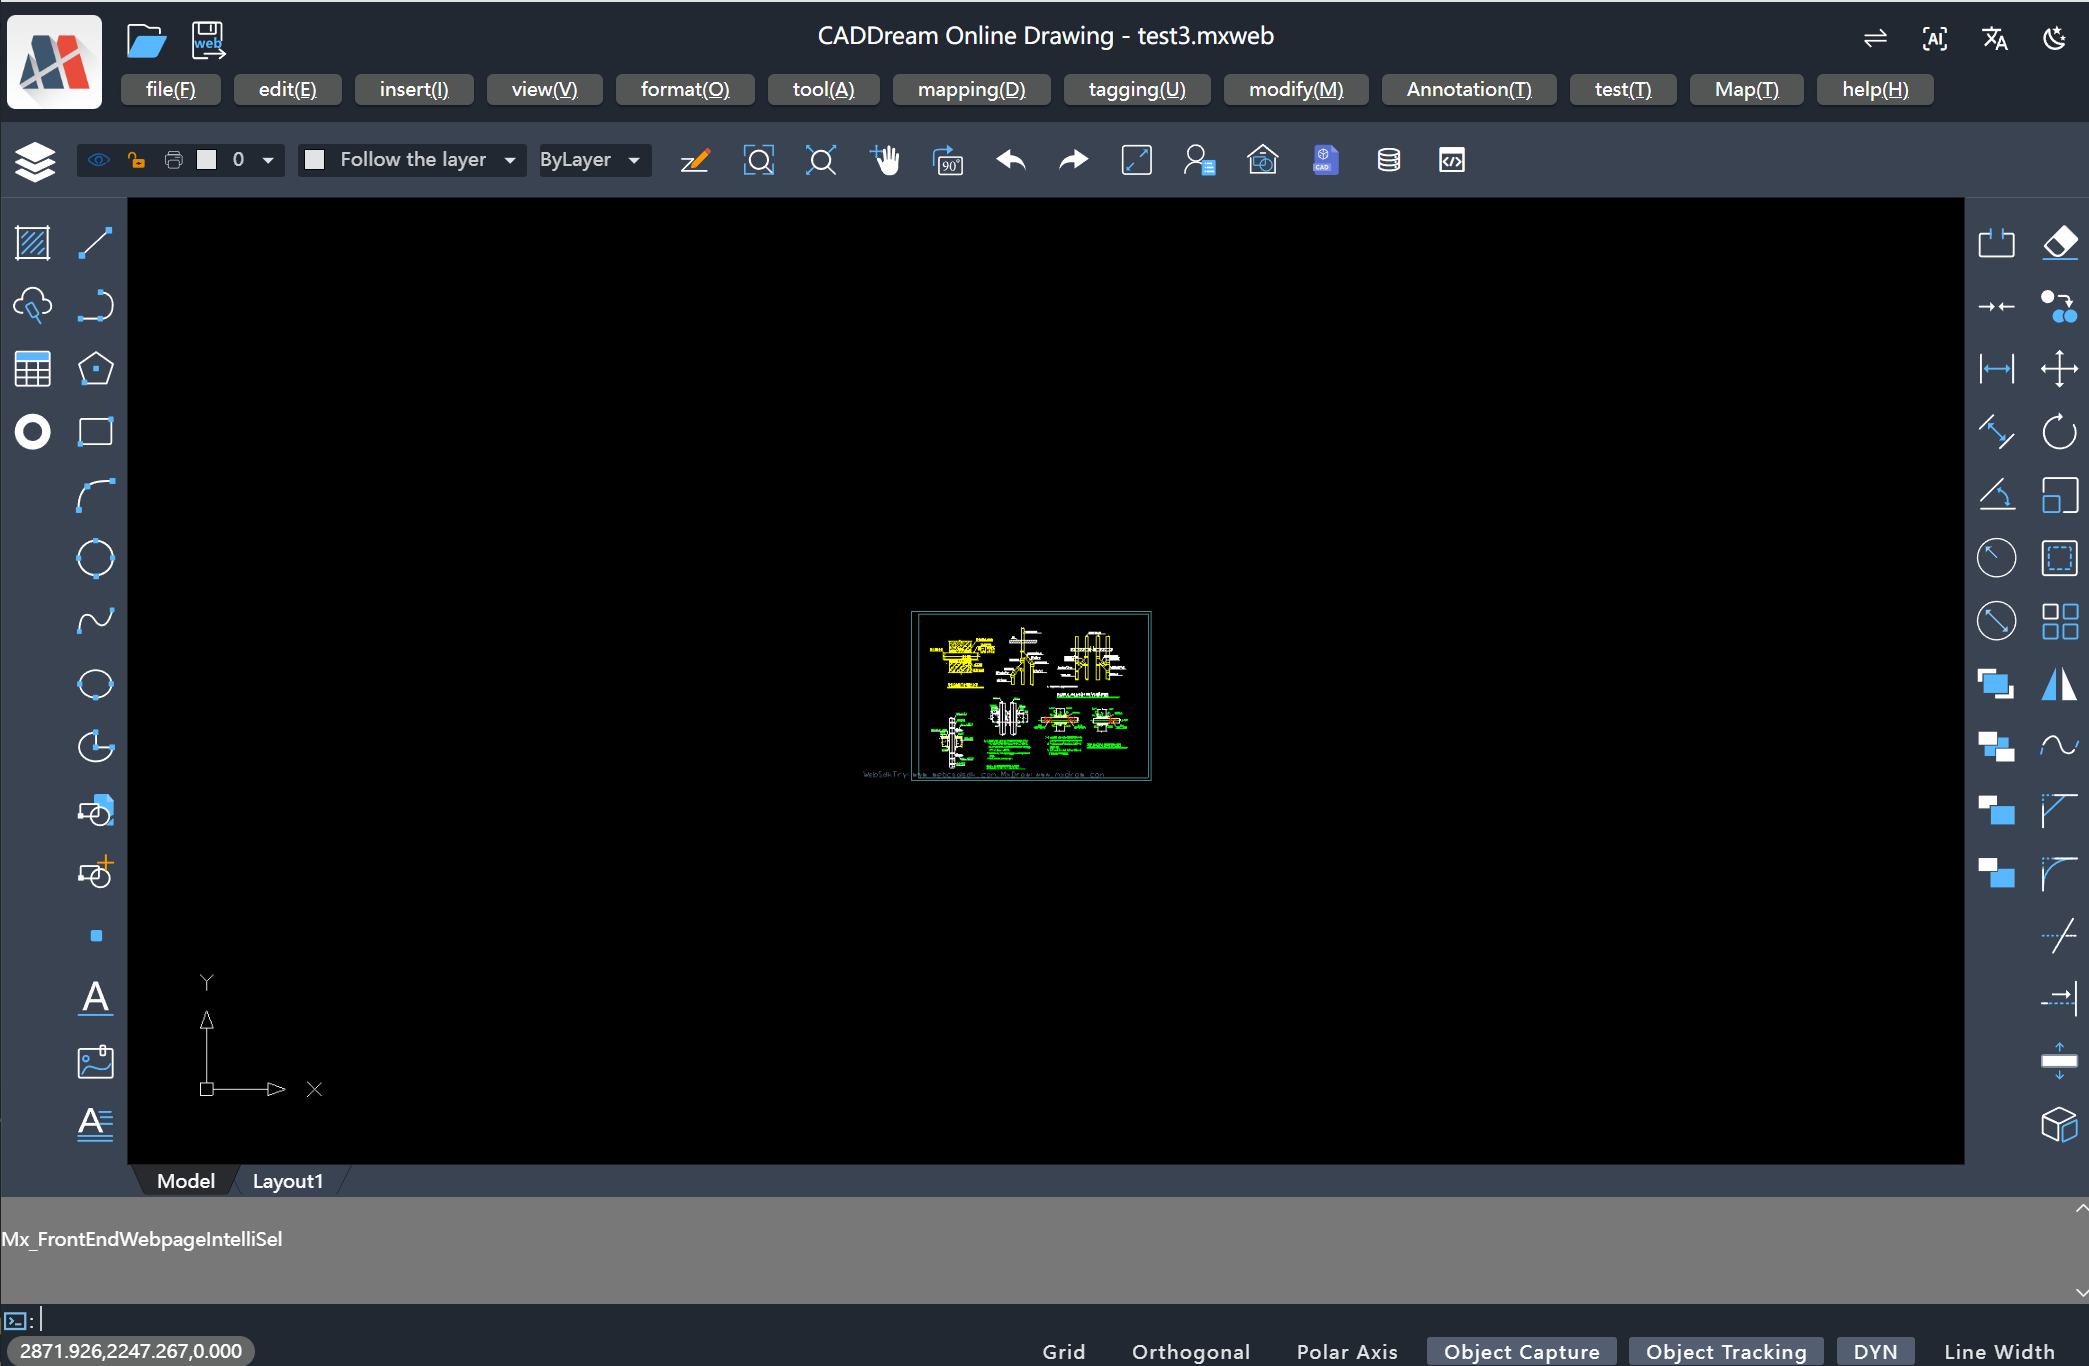
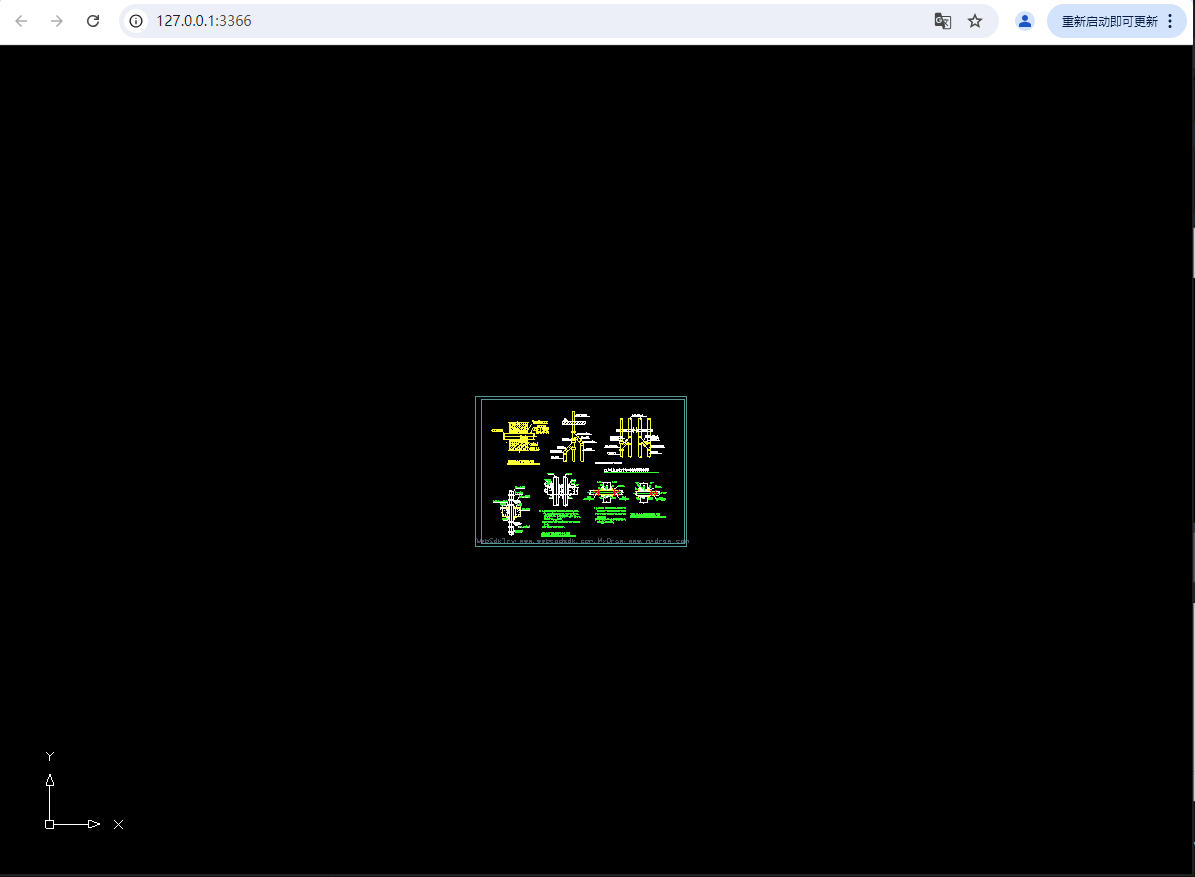
ts// When MxCAD is created successfully, it is equivalent to the mxcad.on("init_mxcad") event listener MxFun.on("mxcadApplicationCreatedMxCADObject", (param) => { let mxcad: McObject = param.mxcad; // Obtain the UI configuration object through the context // The value of the uiConfig object can refer to the `mxUiConfig.json` file MxPluginContext.getUiConfig().then((uiConfig)=>{ uiConfig.isShowHeader = false;//Do not display the header uiConfig.isShowFooter = false;//Do not display the footer uiConfig.mLeftButtonBarData.isShow = false;//Do not display the left selection bar uiConfig.mRightButtonBarData.isShow = false;//Do not display the right selection bar uiConfig.isShowModelNav = false;//Do not display the bottom status bar }) })Comparison of running effects:
- Before modification:
- After modification:
Edit the buttons of the interface operation bar
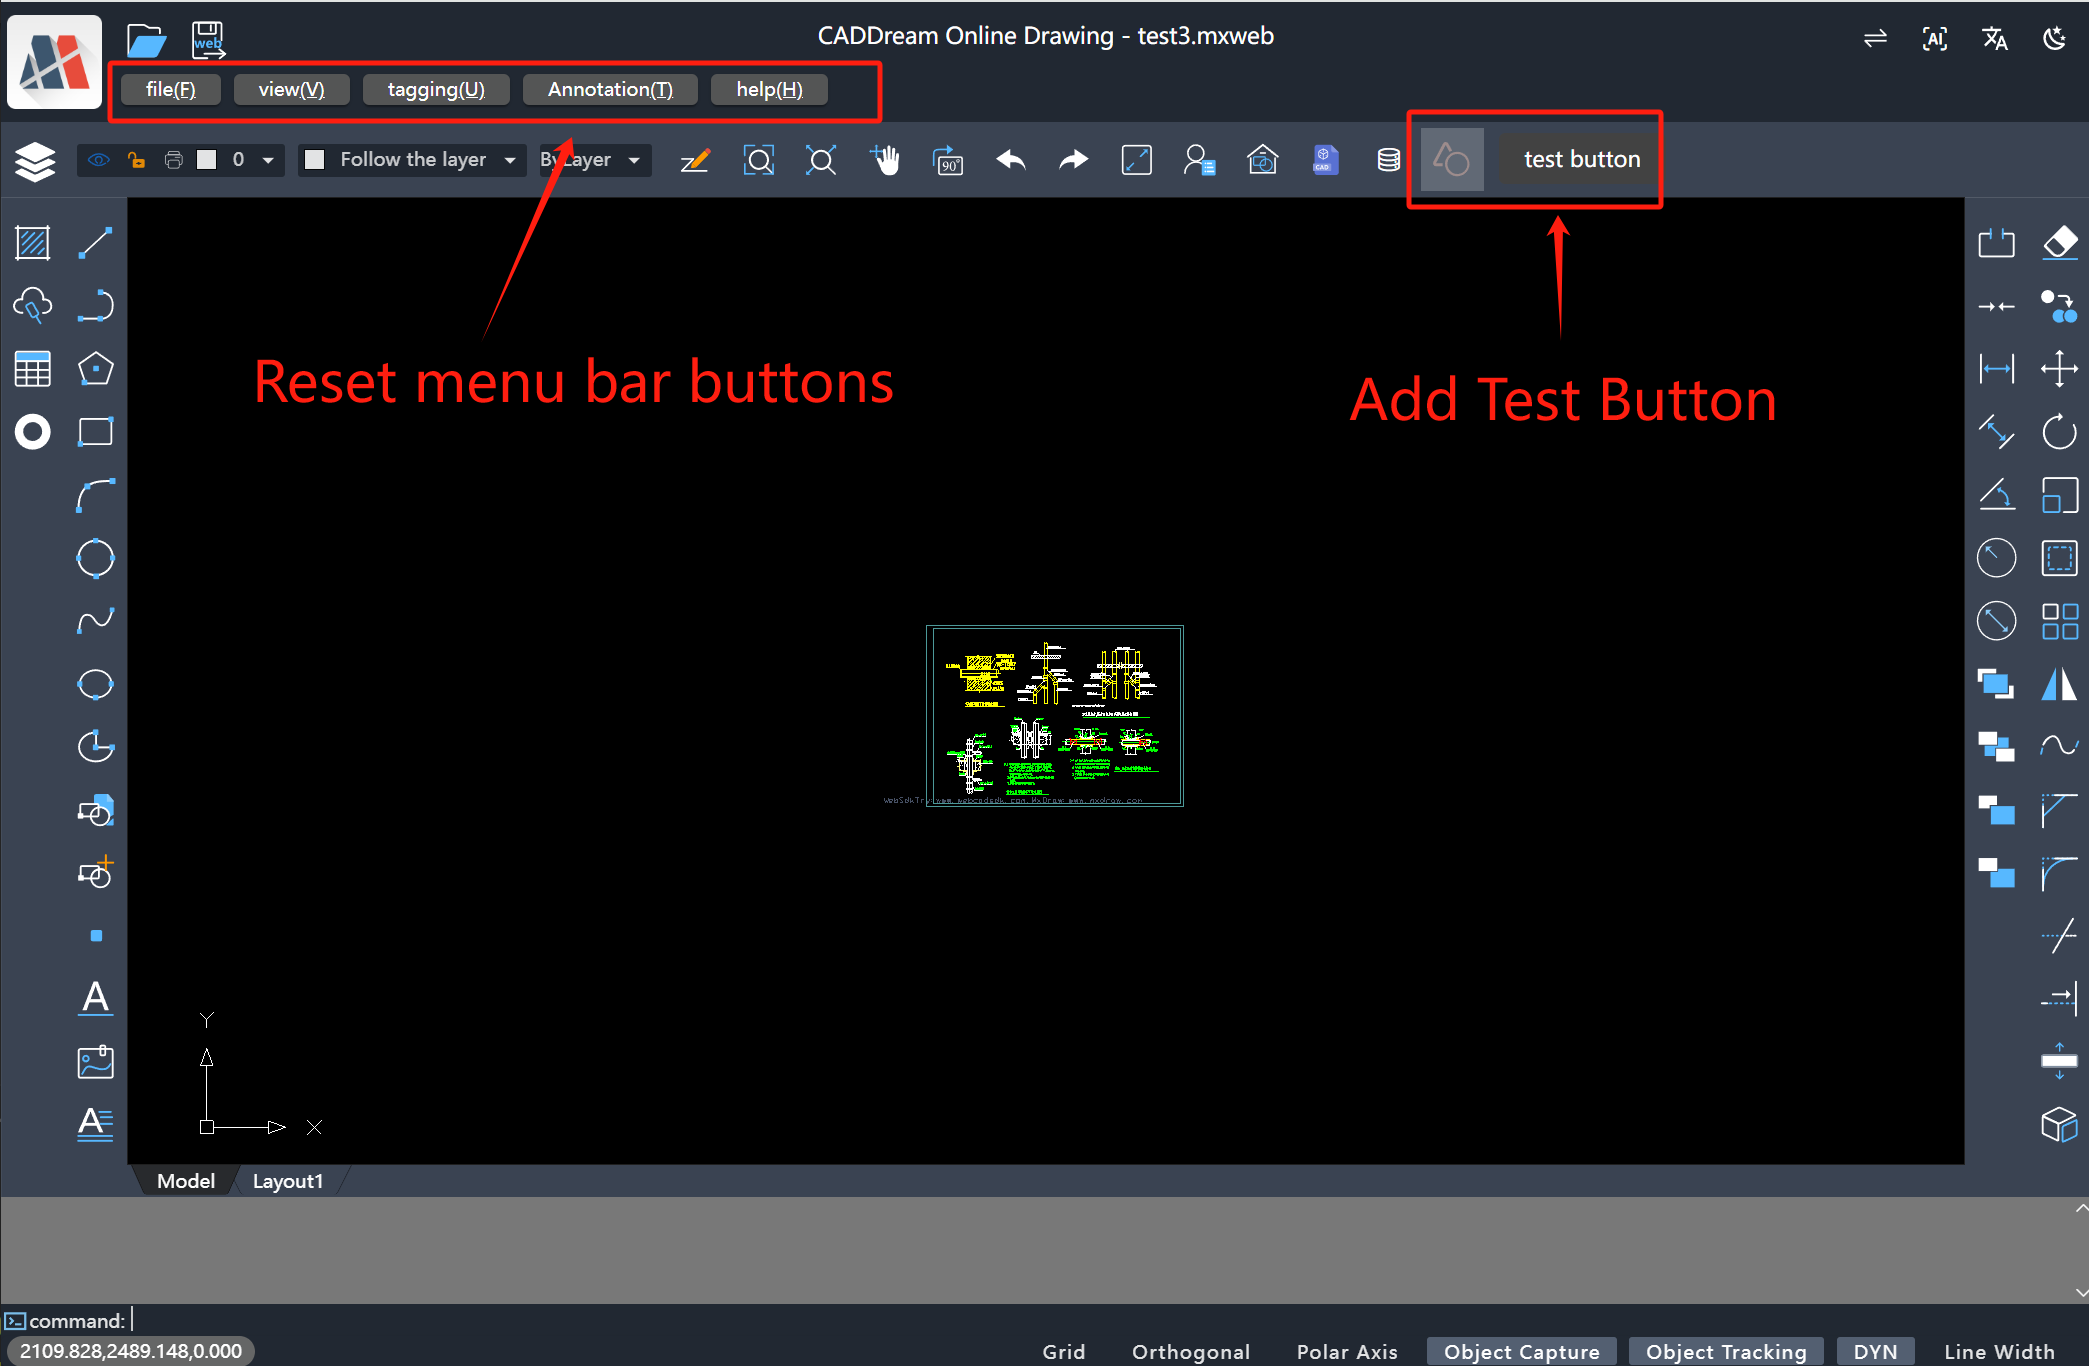
ts// When MxCAD is created successfully, it is equivalent to the mxcad.on("init_mxcad") event listener MxFun.on("mxcadApplicationCreatedMxCADObject", (param) => { let mxcad: McObject = param.mxcad; // Obtain the UI configuration object through the context // The value of the uiConfig object can refer to the `mxUiConfig.json` file MxPluginContext.getUiConfig().then((uiConfig)=>{ // Add a button to the top operation bar uiConfig.mTopButtonBarData.push({ icon:'icon-test', prompt: "Test Button", cmd: "Mx_test" }) // Modify the top menu bar data const includeTabArr:string[] = ['File(F)','View(V)','Dimension(U)','Annotation(T)','Help(H)'] // Filter out the data that meets the conditions from the original menu bar data const newList = uiConfig.mMenuBarData.filter(item=>includeTabArr.includes(item.tab)); // Reassign values to the top menu bar uiConfig.mMenuBarData.length = 0; uiConfig.mMenuBarData.push(...newList) }) })The running effect is as follows:
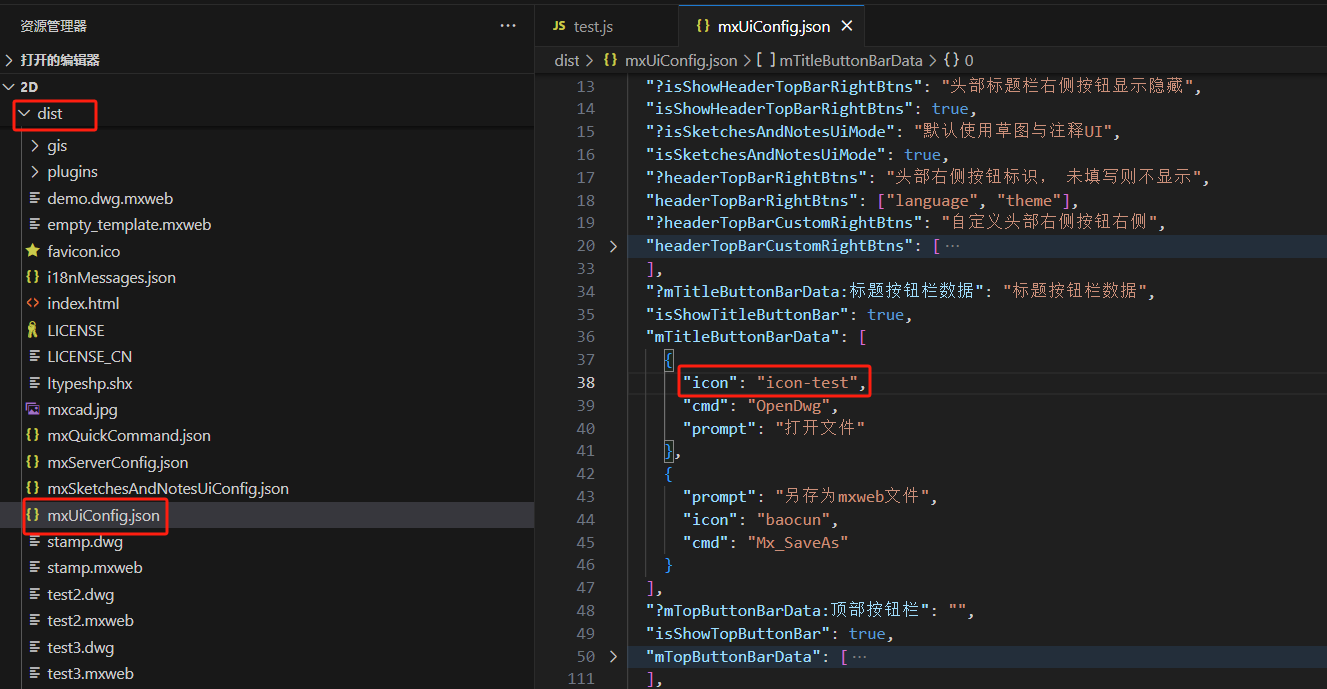
When customizing the addition of buttons to the toolbar, it will involve adding icon styles set by ourselves in the project. The setting method is as follows:
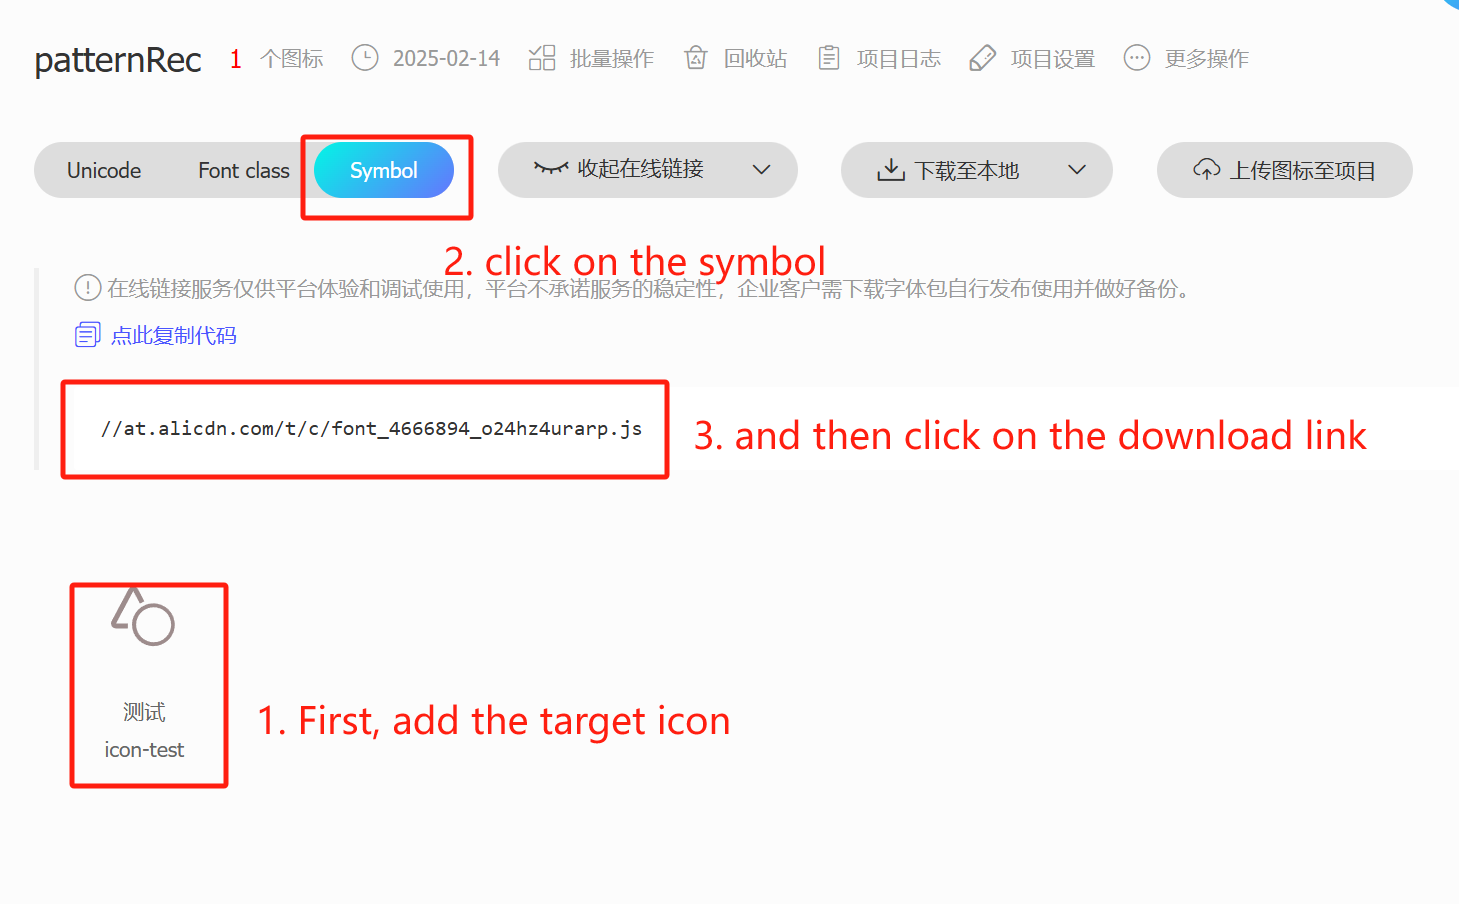
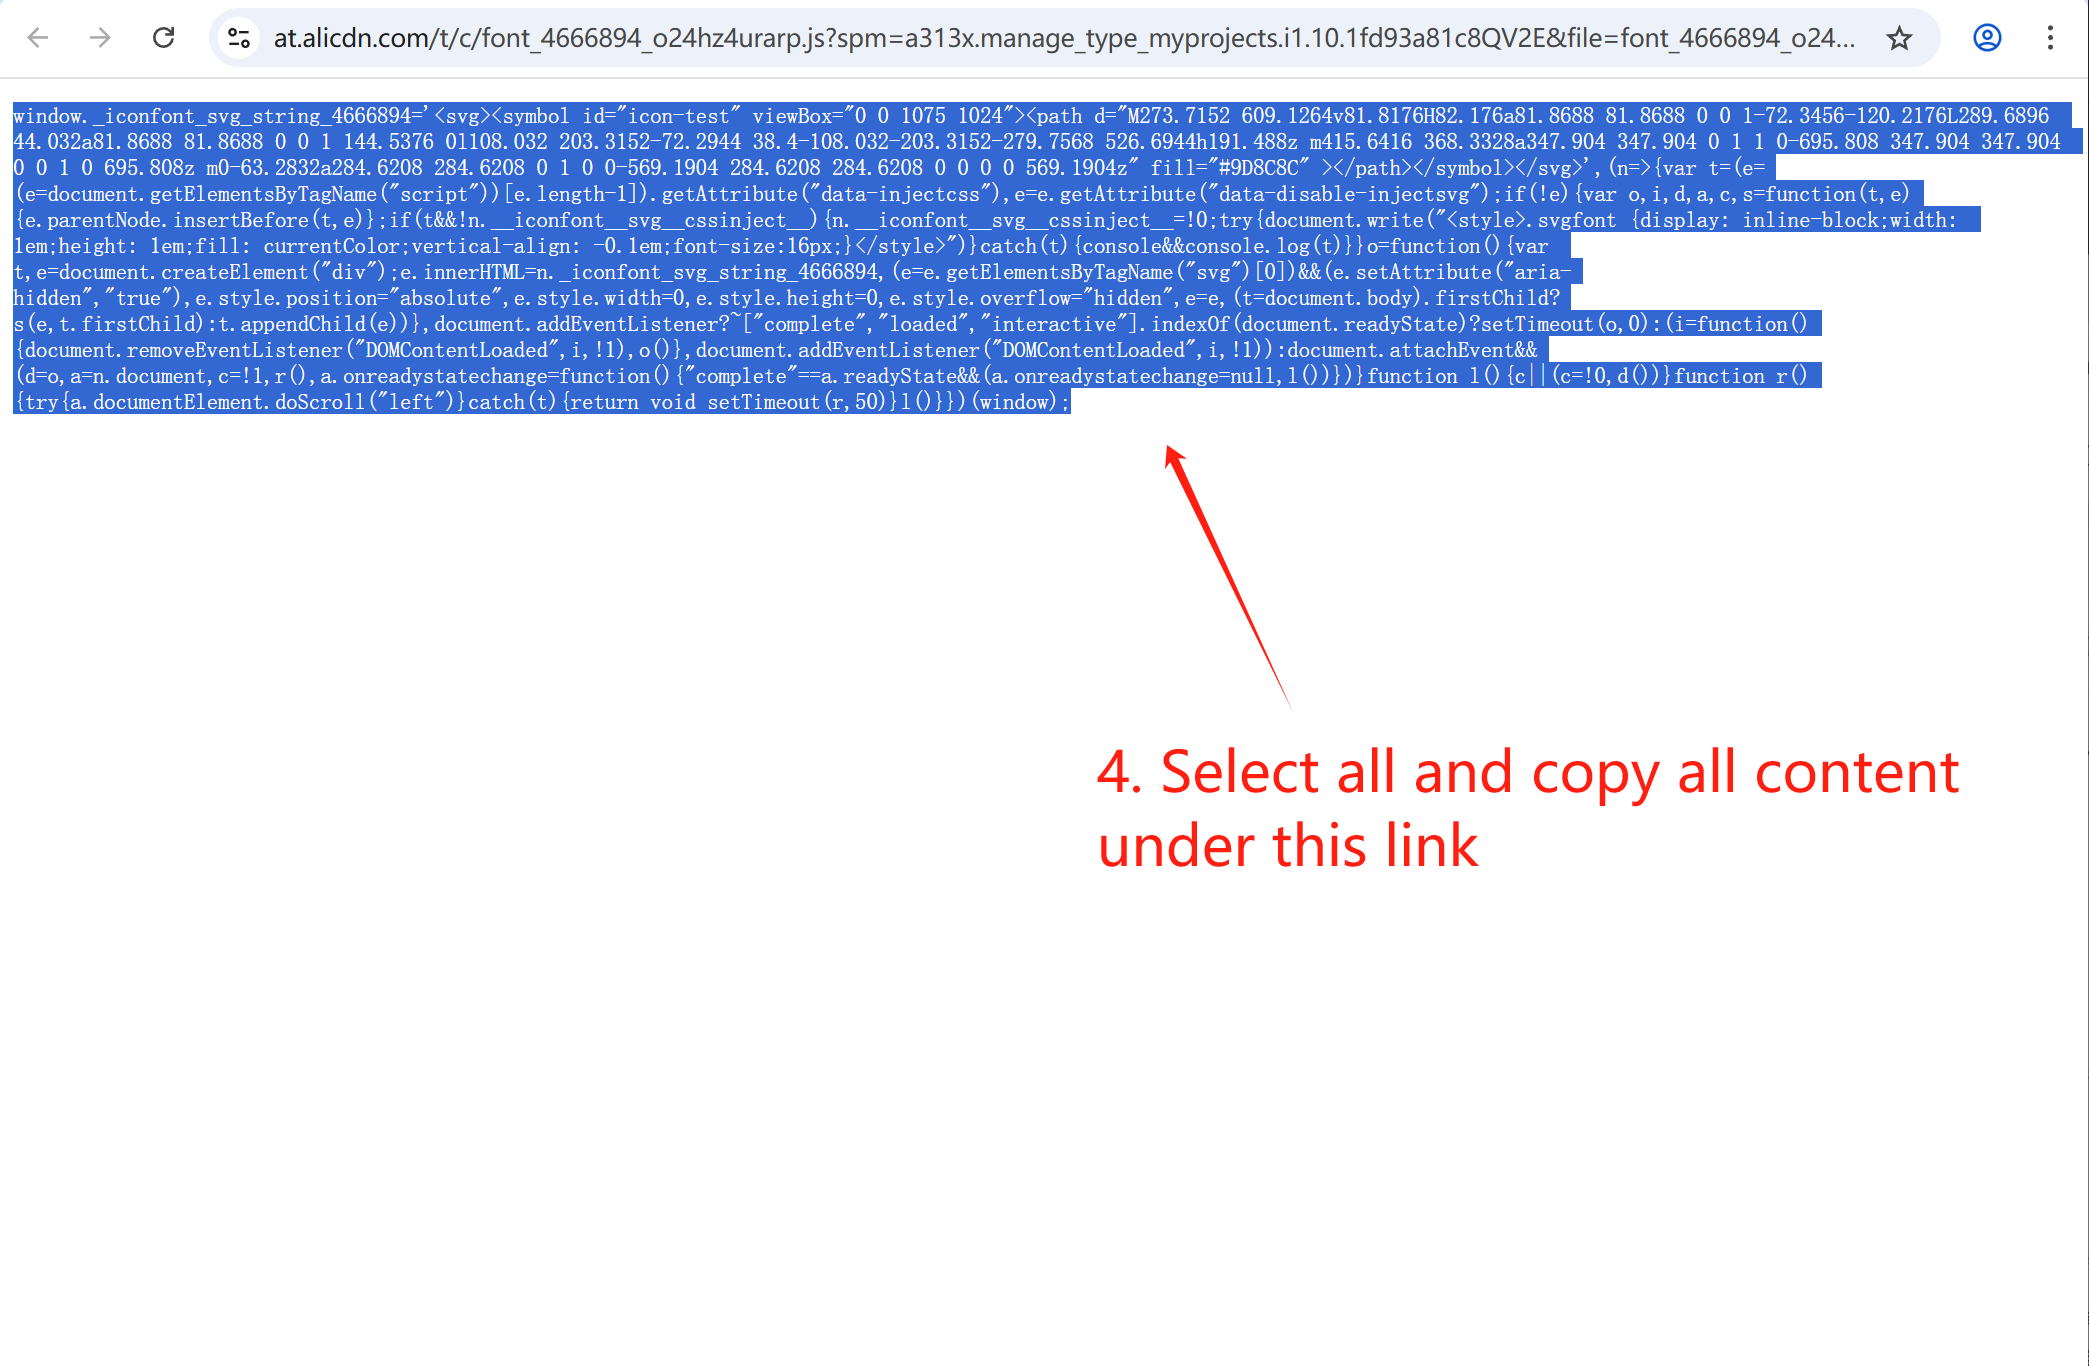
- Add your target icons in the iconfont icon library. If you don't know how to add your own icons in iconfont, you can find relevant documents on the official website.
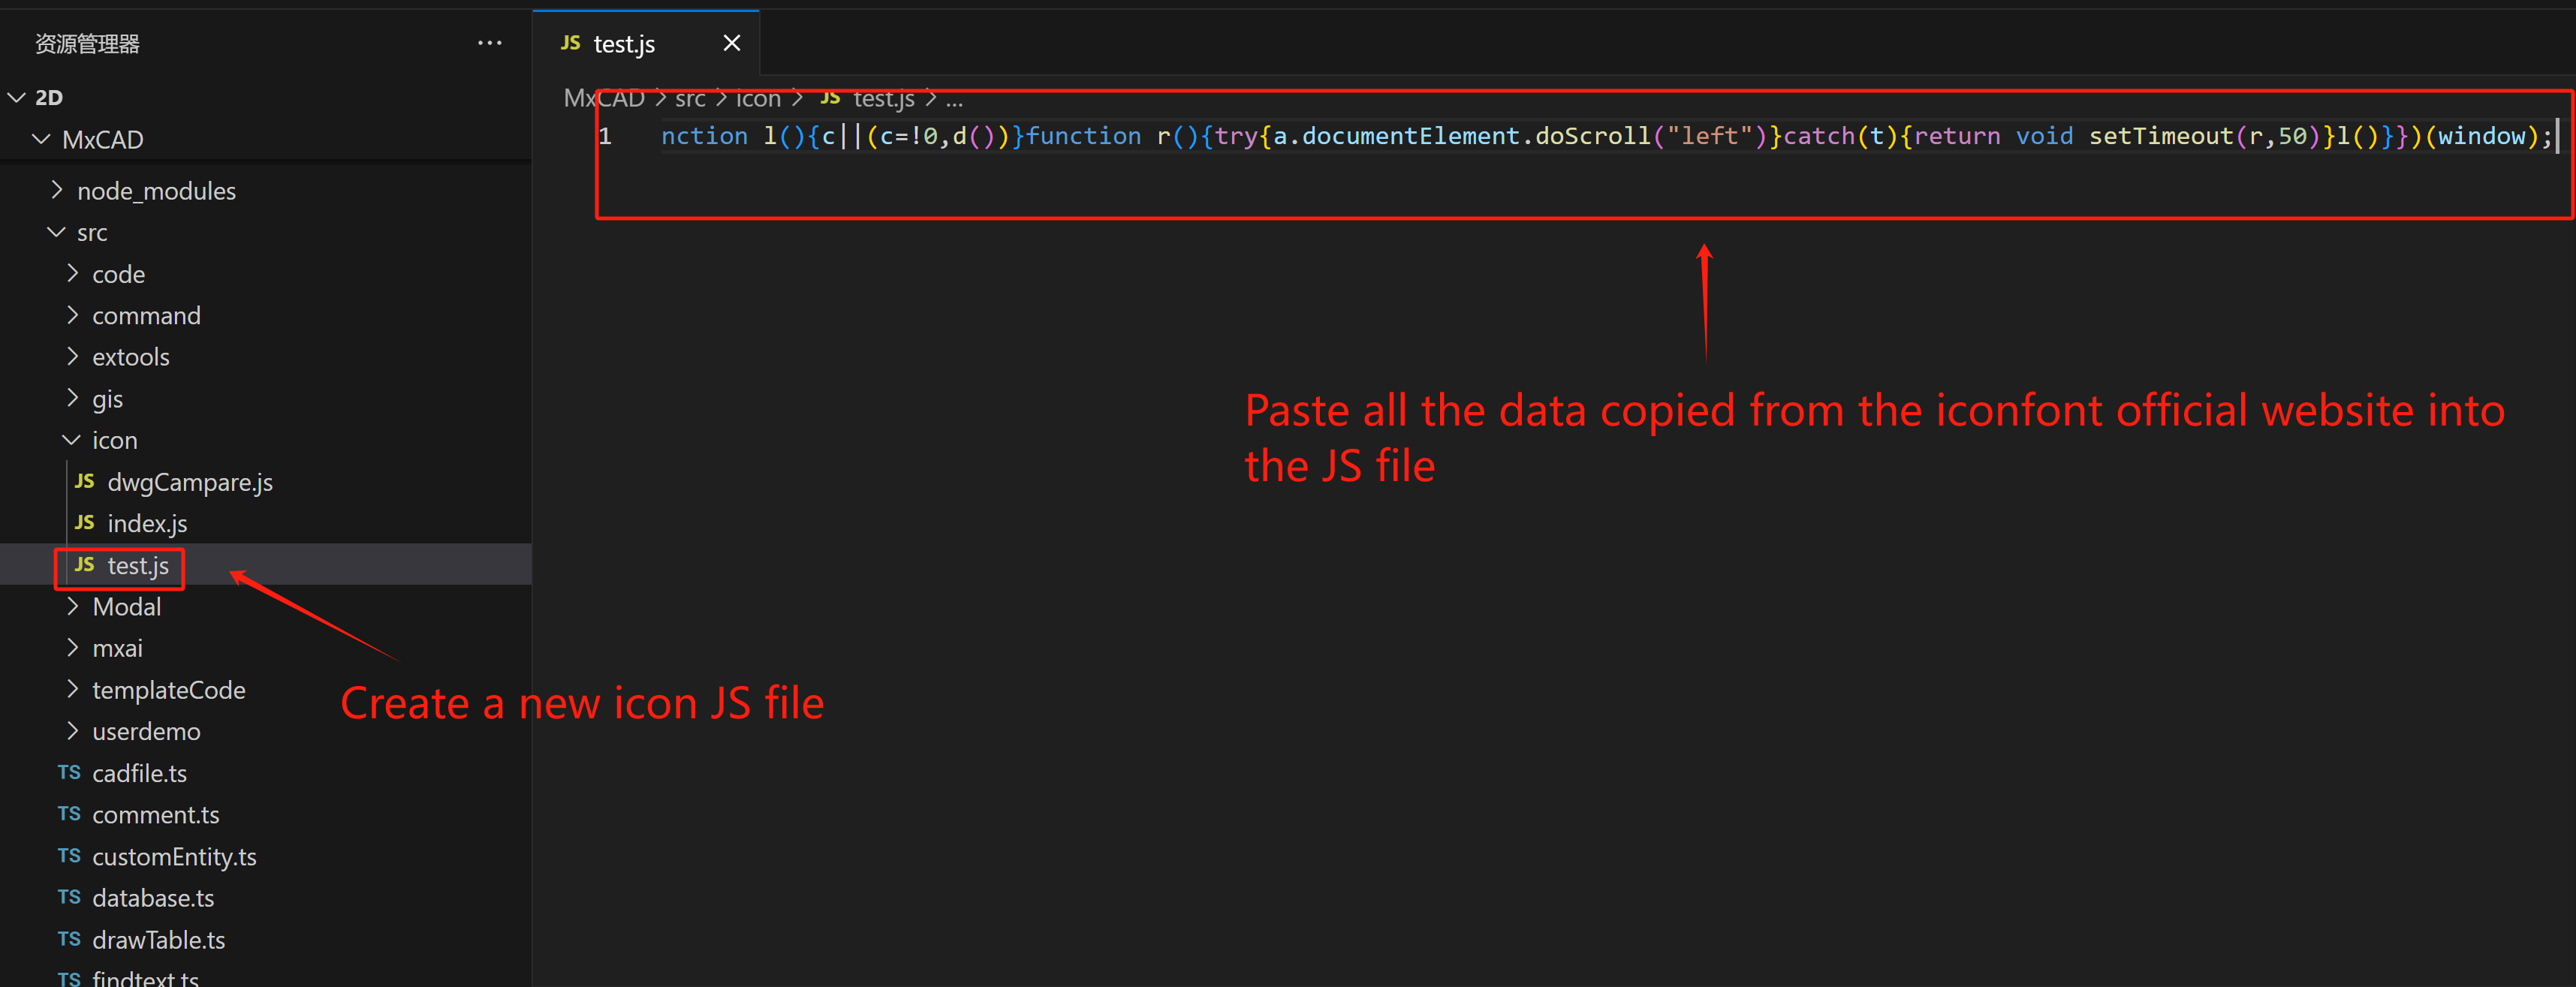
- Create a js file in the MxCAD project. In the following example, a
test.jsfile will be added underMxDrawCloudServer\SRC\sample\Edit\2d\MxCAD\src\icon, and paste the data copied from the iconfont official website link above into test.js.
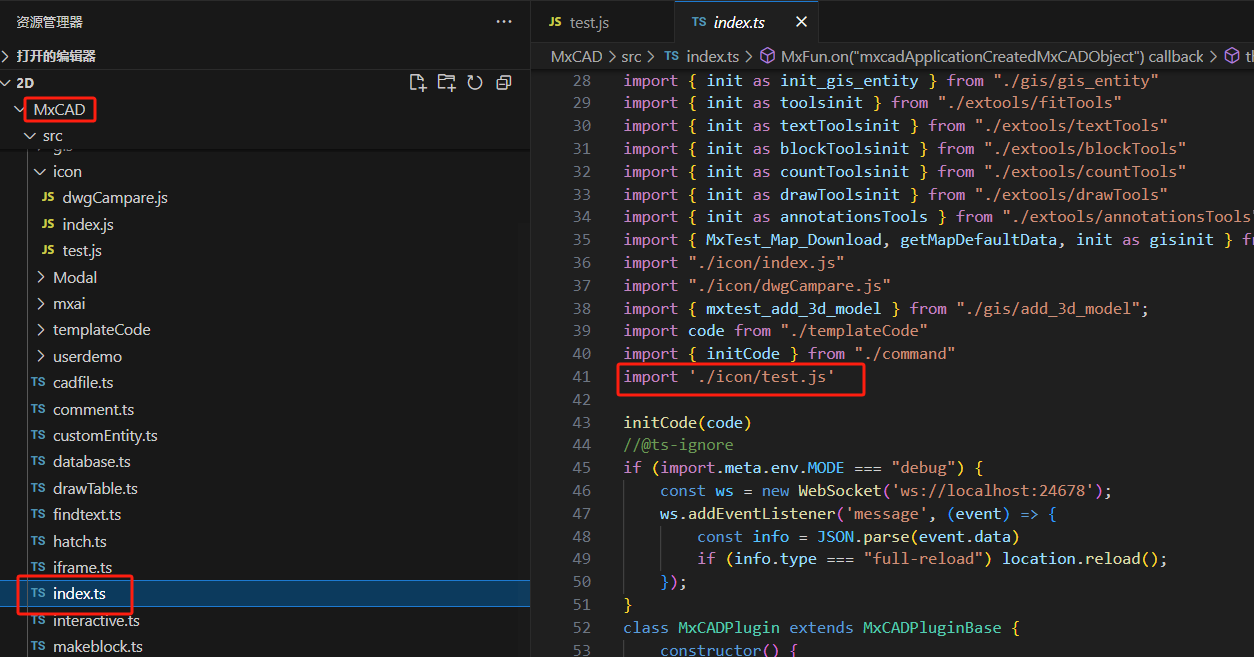
- Import the above icon file in the index.ts file of the MxCAD project to realize loading the icon information directly when the project starts.
- Replace and load new icons
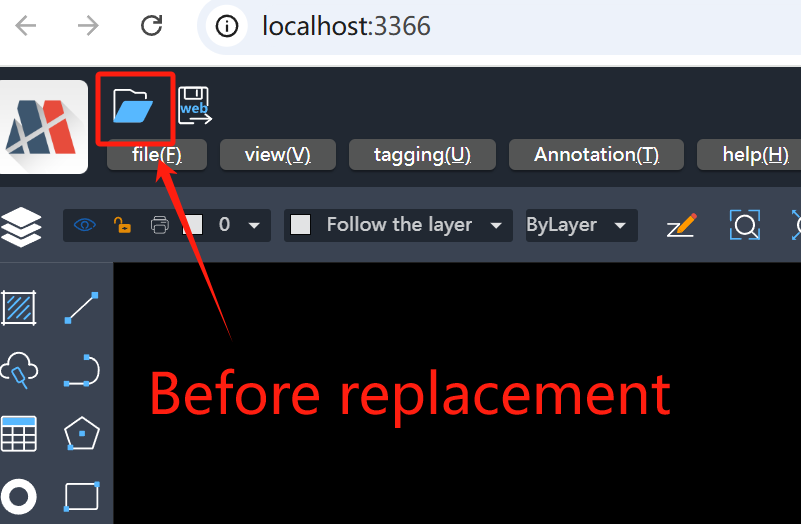
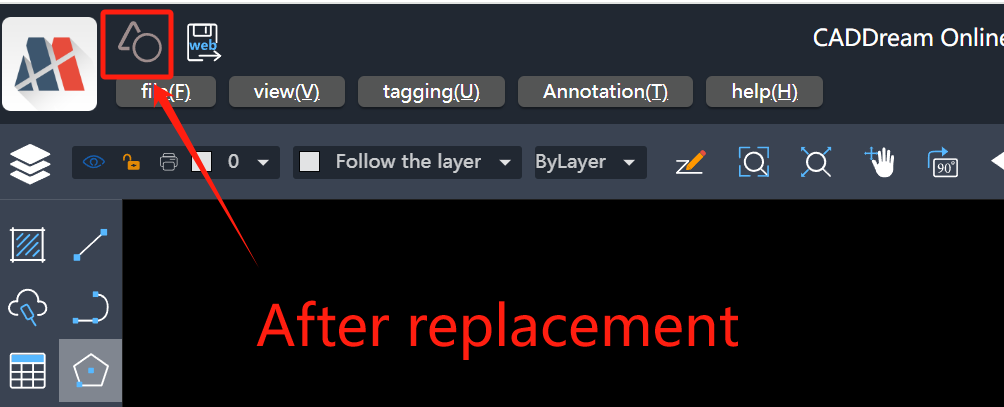
- The effect demonstration is as follows:
Add Sidebar
During the development of the MxCAD project, we often encounter the need to set multiple sidebars. Therefore, in the MxPluginContext object, we provide settings for adding left and right sidebars. The specific setting method can refer to the following example:
Create a new test folder in the MxCAD project to specifically write files related to the new sidebar.
Create a new useComponent.ts file under the test folder, where users can store variables to control the display/hide of the sidebar, or related logical variables inside the sidebar.
ts// useComponent.ts import { ref } from 'vue' export const isShow = ref(false);- Create a new index.vue file under the test directory, and write the sidebar interface in this file.
vue// index.vue <template> <div v-show="isShow"> <h4>This is a test component</h4> </div> </template> <script setup lang="ts"> import { isShow } from "./useComponent"; </script> <style scoped></style>- Create a new index.ts file under the test folder, and write the relevant logic for the initial loading of the sidebar in this file.
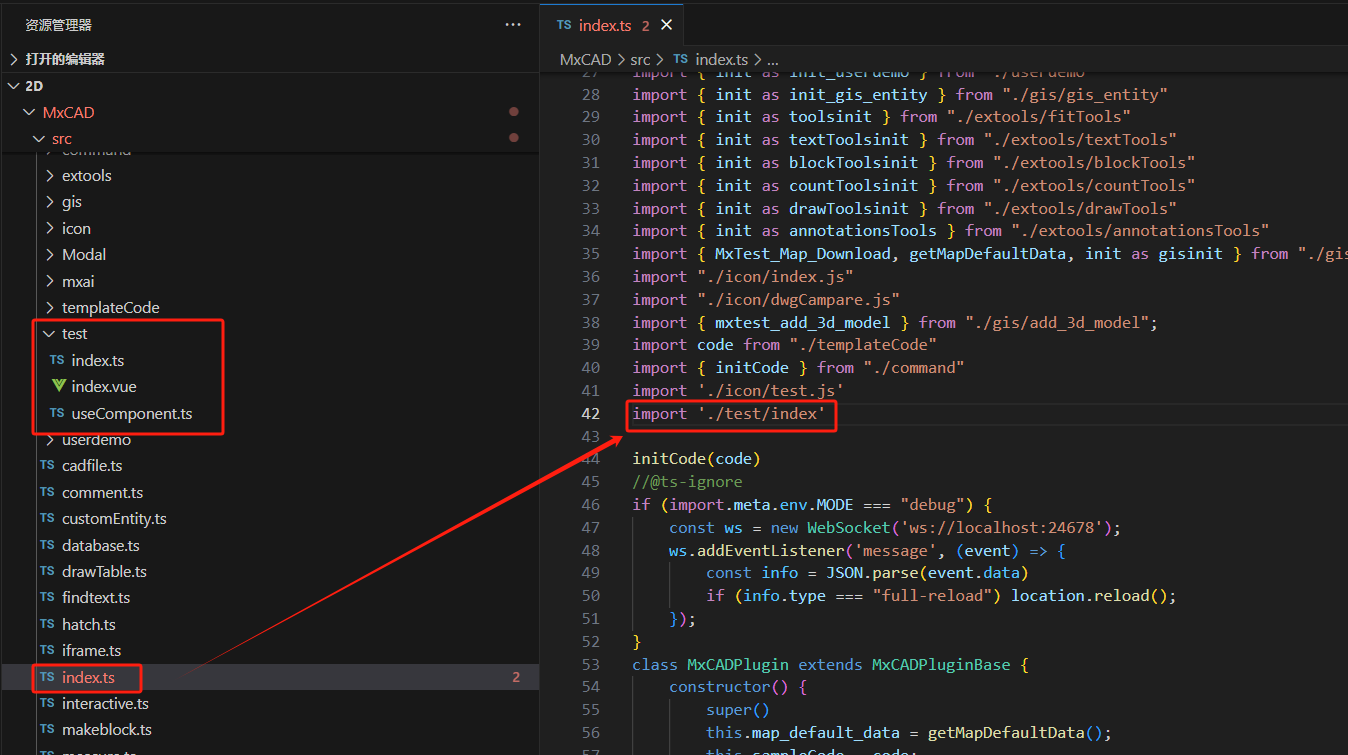
ts// index.ts import { defineAsyncComponent } from "vue"; import { isShow } from "./useComponent"; /** addDrawerComponent(): Create a sidebar "Test_Component":Set the name of the sidebar */ MxPluginContext.addDrawerComponent("Test_Component", { isShow: isShow,// ref variable to control the display/hide of the sidebar component: defineAsyncComponent(() => import("./index.vue")),// Load the content of the sidebar component width: 600,// Set the width of the sidebar title: "Test Left Popup",// Set the title of the sidebar cmd: [ { cmd: "Mx_Test",// The command name to control the sidebar call: async () => { isShow.value = !isShow.value; },// Command callback }, ], }); // Add the sidebar object created above to the project through the MxPluginContext object MxPluginContext.getUiConfig().then((config) => { if (!config?.leftDrawerComponents?.includes("Test_Component")) { config?.leftDrawerComponents?.push("Test_Component"); } });- Then, import the index.ts file under the test directory into the index.ts file under the MxCAD project so that the MxCAD project can load the newly created sidebar during initialization.
- Finally, execute the "Mx_test" command to view the running effect
Control Command Line Focus
During the secondary development of the MxCAD project, if an input box is set on the interface, no matter how you operate, the cursor will always focus on the command line input, and cannot be correctly positioned at the target input box. This is because the MxCAD project has built-in focus locking, and the cursor focus of the interface is always controlled in the command line. Therefore, to solve this problem, we provide a function in the context object to manually control whether to enable focus locking.
/**
 setCommandFocus:Set whether to auto-focus
 isCommandFocus:Get whether it is currently in focus state
 */
const { setCommandFocus, isCommandFocus } = MxPluginContext.useFocus();
console.log('Whether to automatically focus on the command line currently', isCommandFocus.value); <textarea rows="20" cols="50" @focus="()=>setCommandFocus(false)" @blur="()=>setCommandFocus(true)"> {{ textContent }}</textarea>Extension
For more development of extended plugins for the MxCAD project, you can click Development of Extended Plugins to view the introduction in the development documentation.